

Prerequisites
- An Astro Private Cloud (APC) 2.1.0 or later installation.
- The ability to install the Astronomer platform on two or more Kubernetes clusters, one per control plane. See Install the control plane.
- A shared database server that every control plane can reach through an identical connection.
- A TLS certificate per control plane that covers both the global and per-control-plane (per-CP) admin names. See the following section.
- Permission to create DNS records for both the global domain and each per-CP admin hostname.
kubectlaccess to each control plane cluster.
Set up TLS and DNS prerequisites
Set these up before you install any control plane. Every control plane is reachable on two kinds of hostnames — the shared global hostname behind the load balancer, and its own per-CP admin hostname that bypasses the load balancer. Both must be covered by TLS and DNS.TLS certificates
For each control plane, provision a certificate whose Subject Alternative Names (SANs) cover both:- The global names —
*.<global-domain-name>, which coverapp.,houston., and the other global subdomains. - That control plane’s per-CP admin names —
*.<cpNN-domain>, for example*.cp01.<parent-domain>.
DNS records
- Per-CP admin hostnames: add a static DNS record for each control plane’s admin hostname (
cp01.<parent-domain>,cp02.<parent-domain>) that points directly at that control plane and bypasses the load balancer. You need these to reach and register a specific control plane before it’s in load-balancer rotation. - Global hostname:
app.<global-domain-name>and the other global names must resolve to all of the control plane load balancers, with a per-CP health check at/controlplane/status. This is the load-balanced, failover record set, configured in the last step of this guide. See Configure the global DNS.
Install control plane 1 (the bootstrap cluster)
Install the Astronomer platform on the first cluster with control plane reliability enabled. CP 1 is the cluster that generates the shared JWT signing material every other control plane reuses. Add the following to your Astronomer Helm values:baseDomainis this control plane’s per-CP admin domain. Each control plane has its ownbaseDomain(cp01.<parent-domain>,cp02.<parent-domain>), distinct from the sharedglobalBaseDomain.controlPlaneHA.enabled: trueturns on control plane reliability mode. The chart renders the global-domain ingresses and the APC API runs as part of a high availability (HA) group.controlPlaneHA.bootstrapJwks: truetells this control plane to generate the shared JWT signing key and certificate. Because this is the first cluster, it bootstraps the material itself, creating two secrets:<release-name>-houston-jwt-signing-keyand<release-name>-houston-jwt-signing-certificate. This certificate also signs Docker Registry tokens; there is no separate registry keypair.controlPlaneHA.globalBaseDomainis the shared domain that all control planes serve.dataPlaneFailover.enabled: trueis optional. It enables data plane failover so that Astro Deployments can be moved between clusters. It’s independent of control plane reliability. See Data plane failover.
Copy the JWT signing material to control plane 2
Both control planes must sign JWTs with the same key and certificate, so that a token minted on one control plane is accepted on the other. CP 1 generated this material in the previous step. CP 2 must reuse it rather than generate its own. Copy these two secrets from CP 1’s Astronomer namespace into CP 2’s Astronomer namespace, keeping the same names and data keys:<release-name>-houston-jwt-signing-keyholds data keytls.key.<release-name>-houston-jwt-signing-certificateholds data keytls.crt.
kubectl get -o yaml and kubectl apply, sealed secrets, GitOps, the External Secrets Operator, or a secrets manager. For example:
bootstrapJwks: false and consumes the pre-copied secrets. Verify that both secrets exist on CP 2 before you continue.
Install control plane 2 (and any subsequent control planes)
Install the Astronomer platform on the second cluster. The values are almost identical to CP 1, with two differences: use this control plane’s ownbaseDomain, and set bootstrapJwks: false so that CP 2 consumes the signing material you copied instead of generating its own.
bootstrapJwks: false makes CP 2 use the pre-copied secrets. You don’t need to disable JWKS generation any other way — HA mode skips generation by default.
Install or upgrade the release on CP 2 and wait for all Pods to be healthy. Because it shares CP 1’s database, CP 2 immediately sees the same users, Workspaces, and Astro Deployments.
Repeat this step and the previous JWT-copy step for every additional control plane you want in the group. Each one copies the same JWT material and points at the same database.
Create the first admin user
Before you can register regions or control planes, you need an admin user to authenticate as. Because all control planes share one database, you create the admin only once and it works across every control plane. Openapp.<global-domain-name> in a browser and complete the first-admin sign-up flow, or use the createUser mutation. The createRegion and registerControlPlane mutations you run next require you to be authenticated as a system admin.
Register the region and control plane 1
Tell the APC API that CP 1 exists and which region it belongs to. You can do this from the APC UI or with GraphQL mutations, authenticated as the admin from the previous step.Create a region
A region is the logical grouping that control planes attach to. All control planes in the same group share the same region. Run thecreateRegion mutation:
nameis a human-readable region name and must be unique.cloudProvideris the cloud provider, for exampleaws,gcp, orazure.
region.id. You need it in the next call and again when you register CP 2. Only one region can be active at a time.
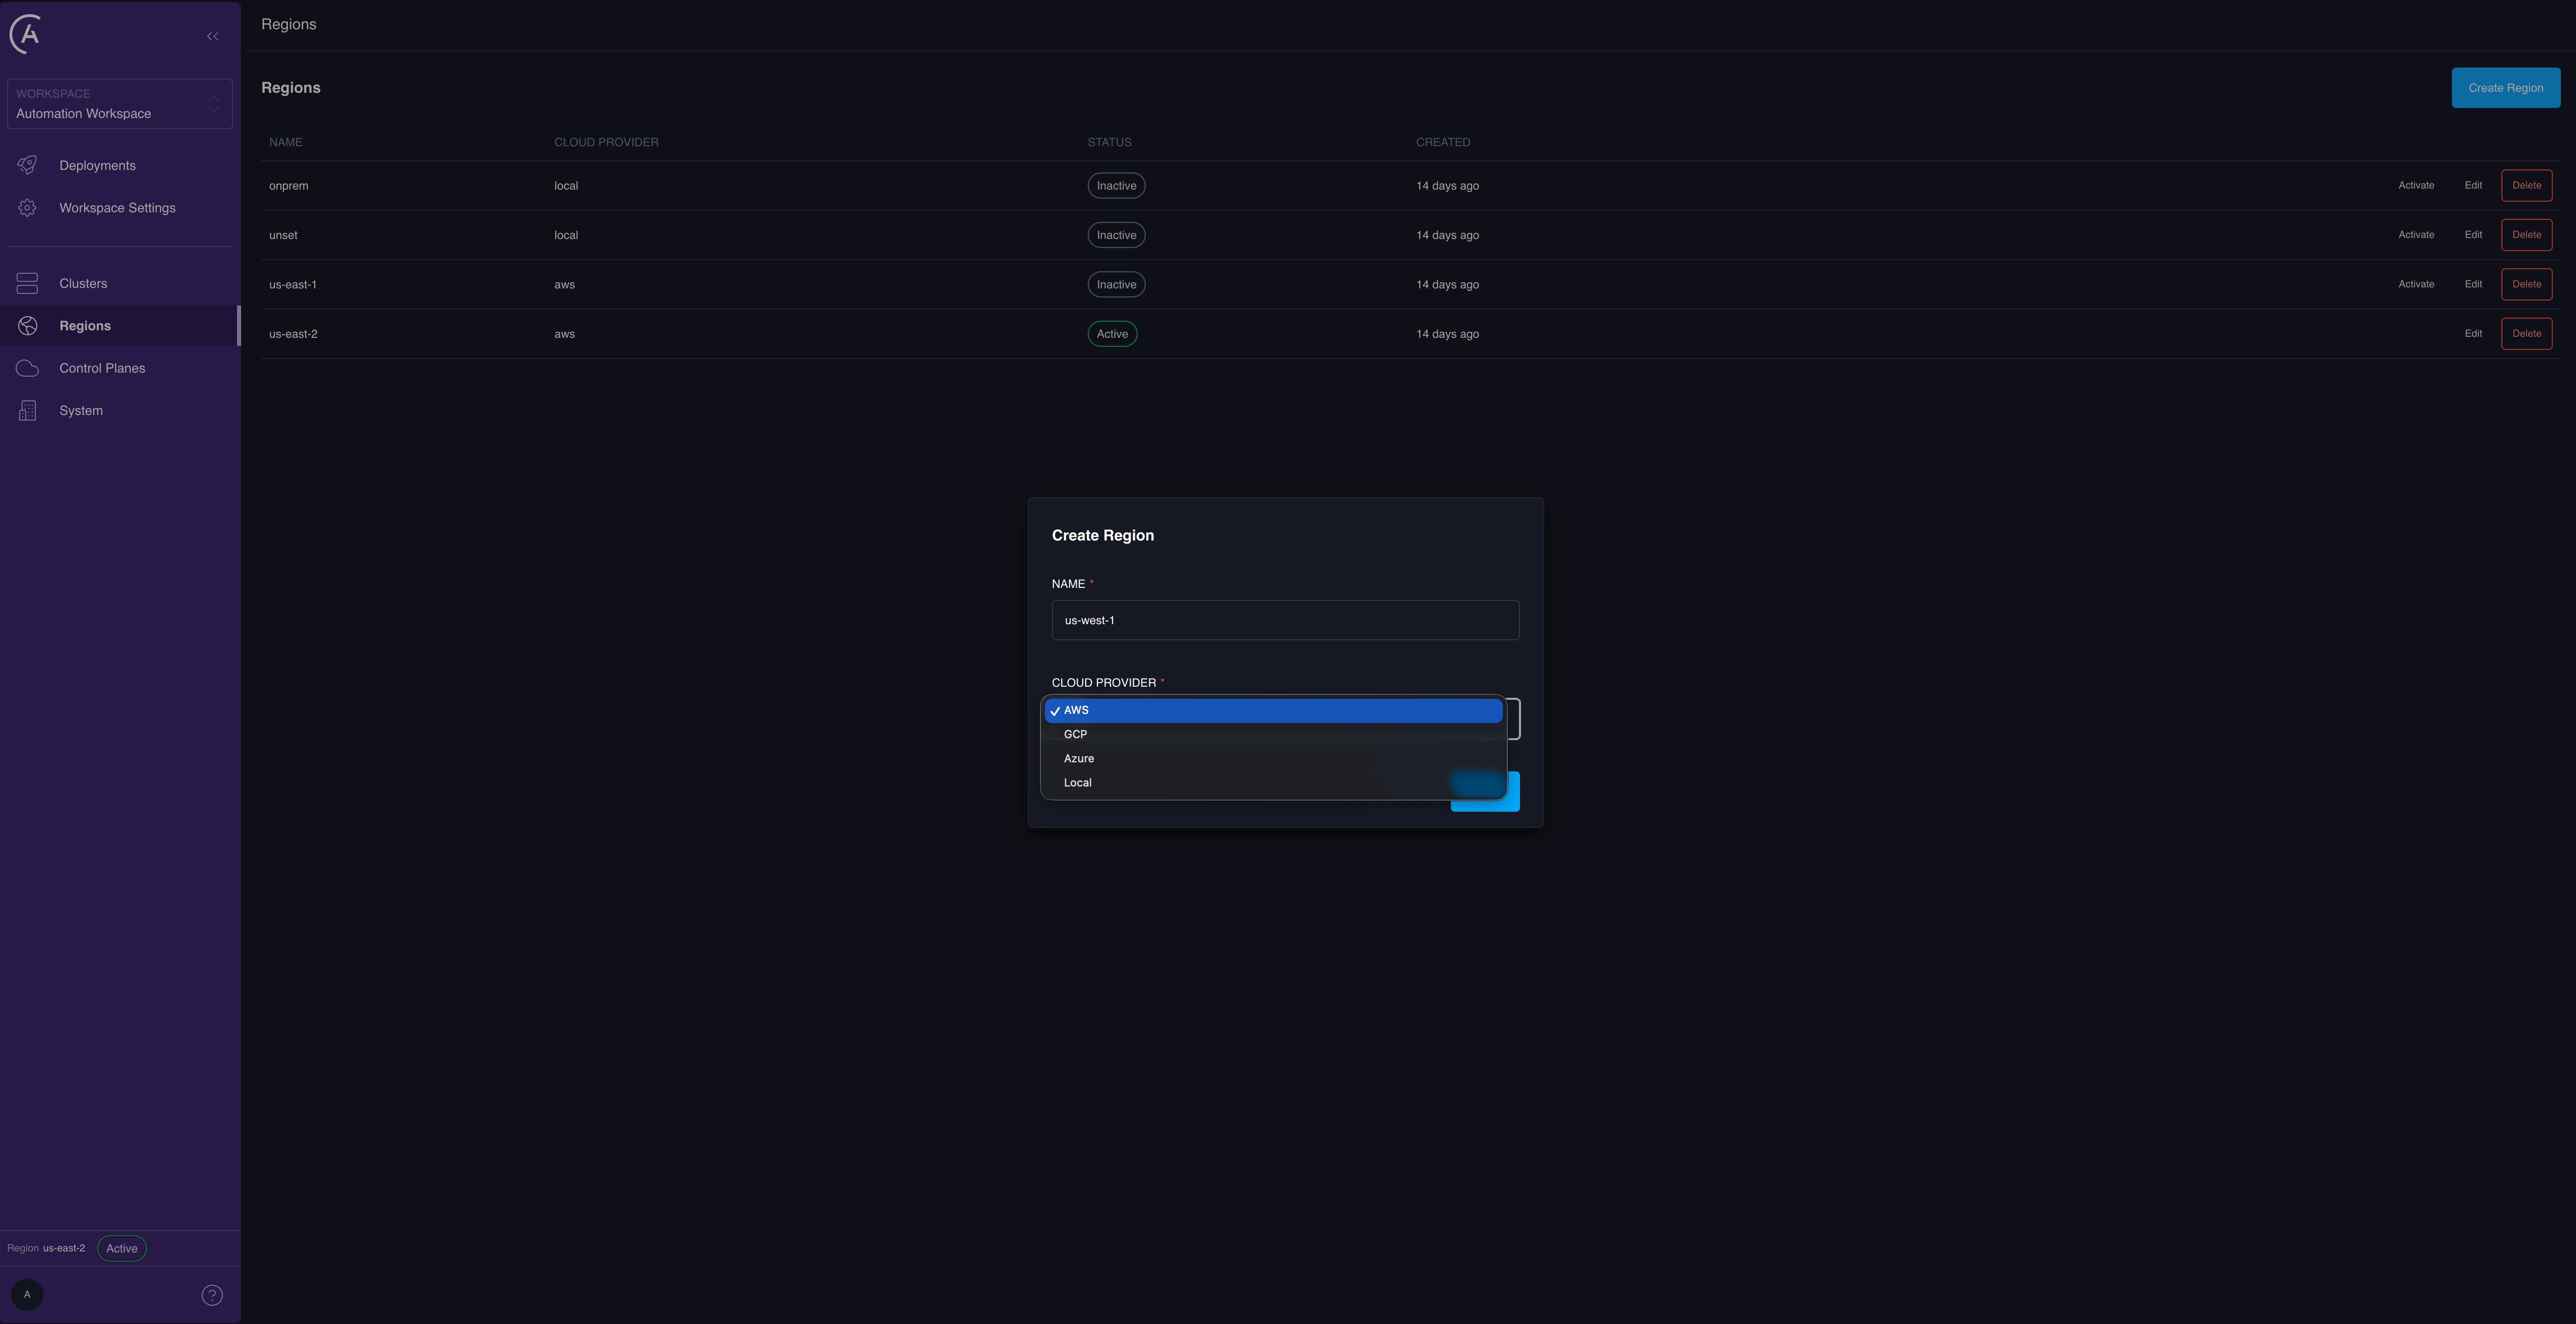
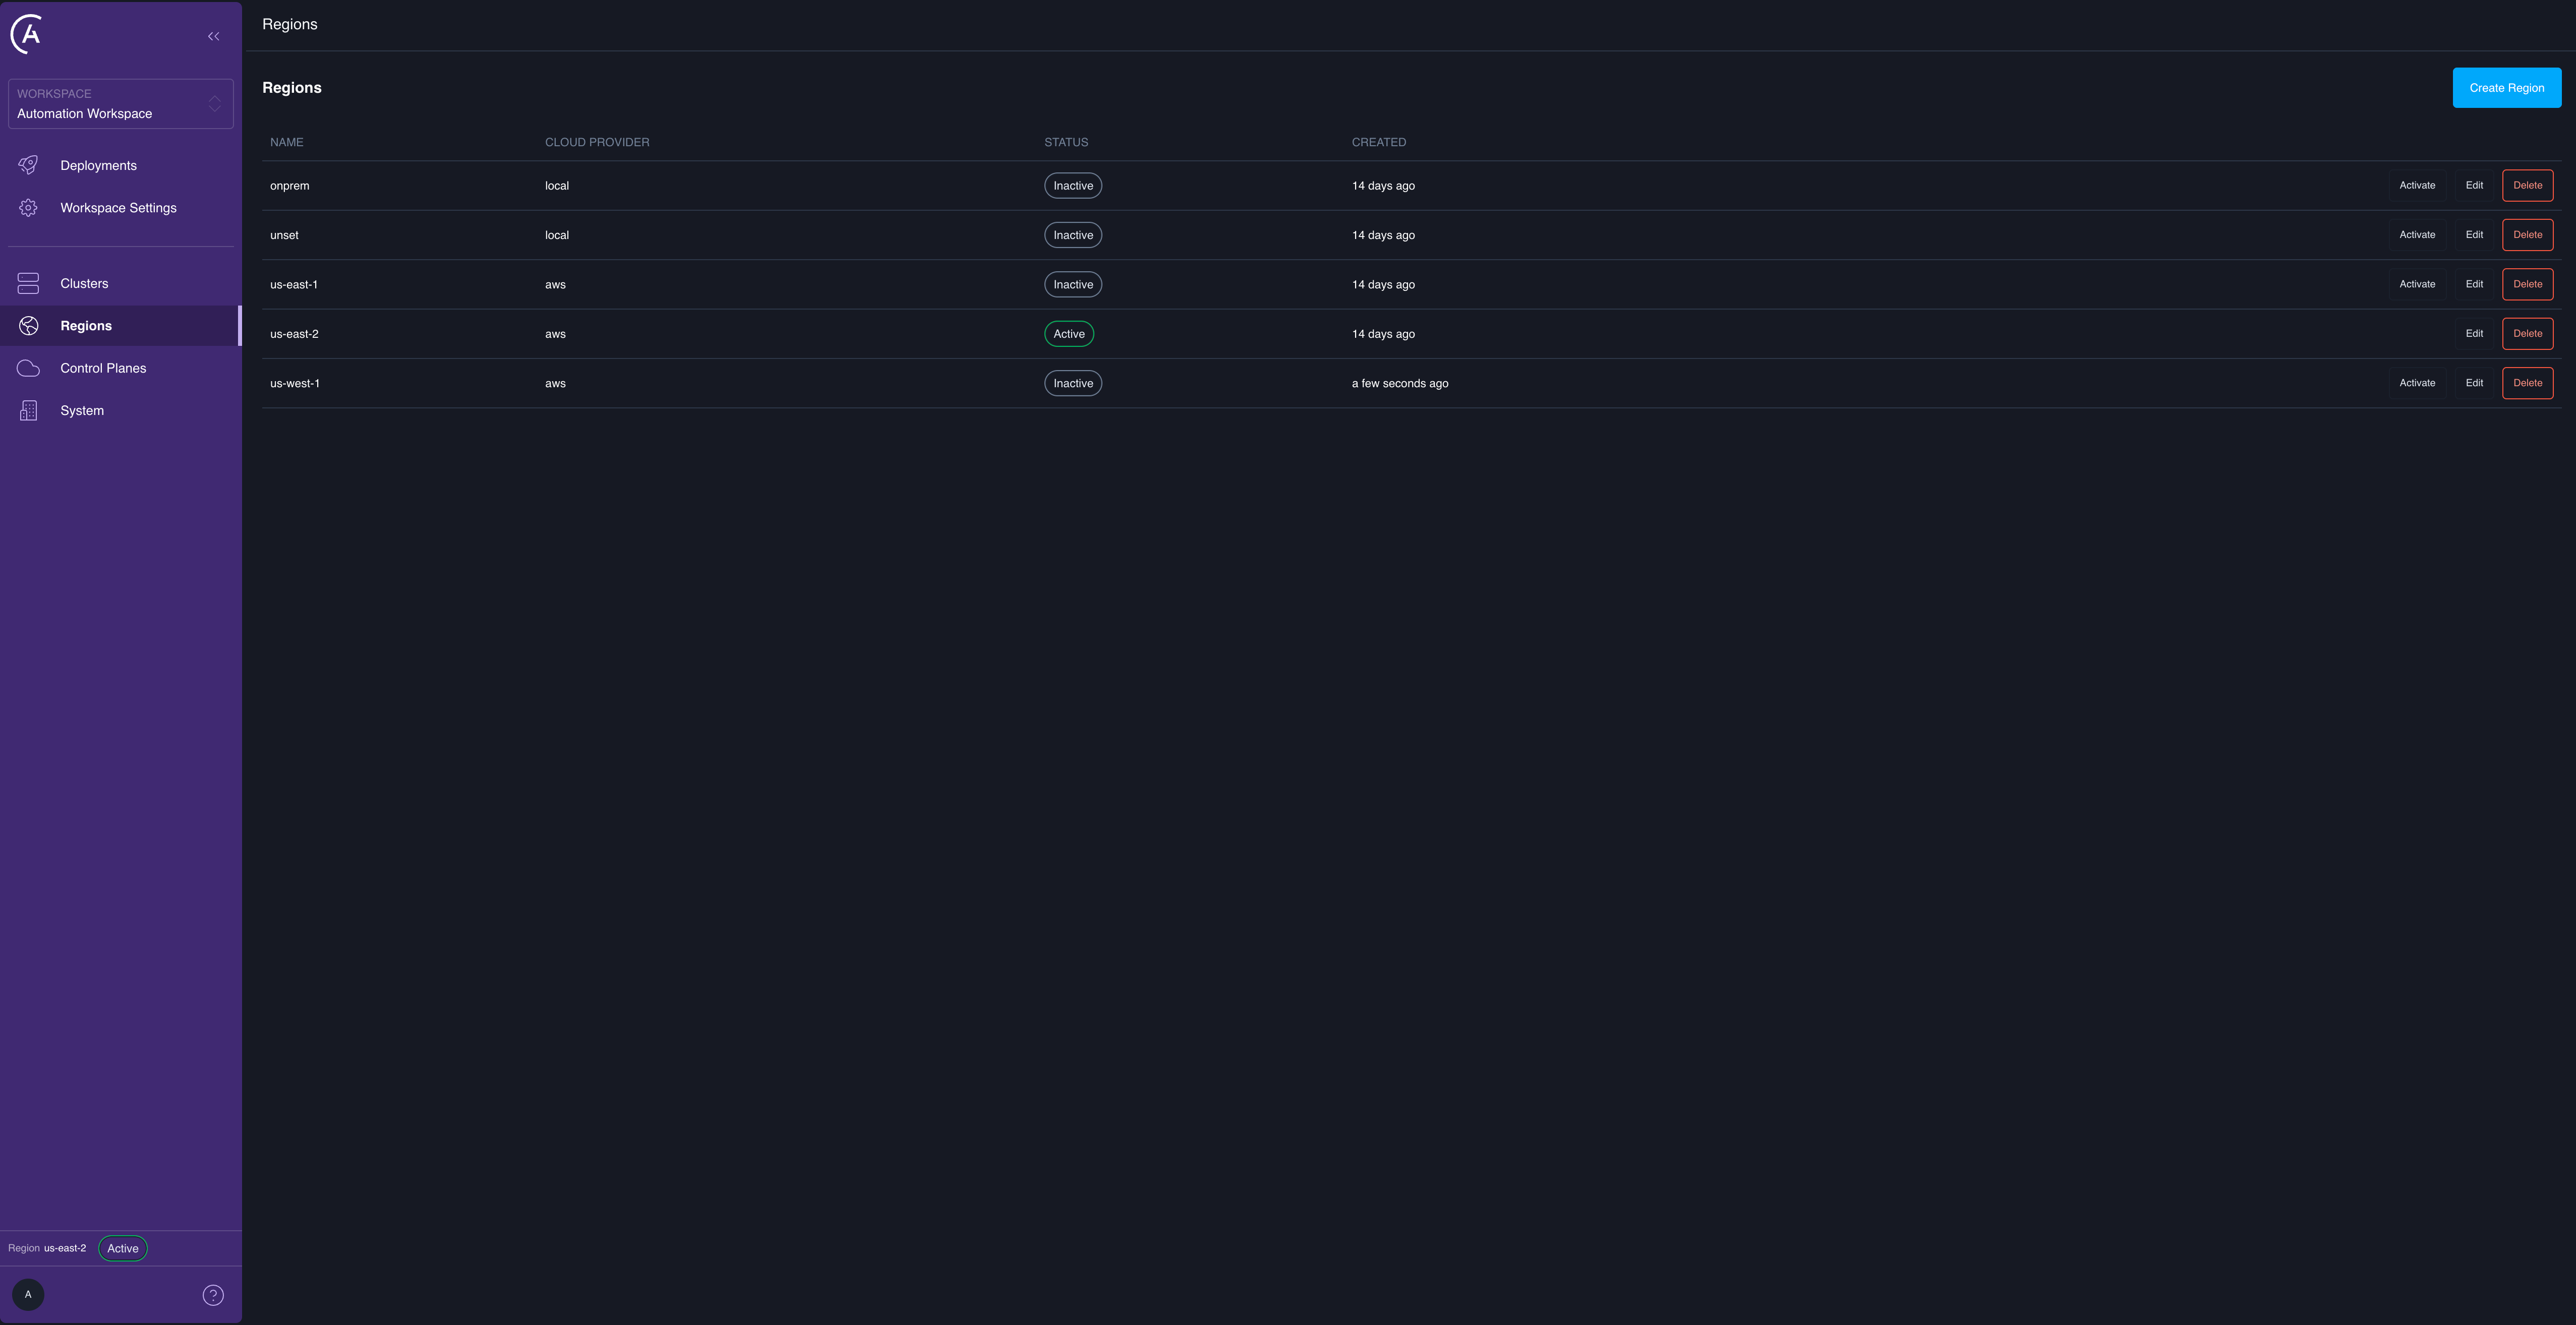
To create the region from the APC UI instead, open the Regions tab in the left sidebar (visible after you enable control plane reliability) and select Create Region. Enter a Name and choose a Cloud Provider, then save. The region appears in the list with an Inactive status. New regions start inactive, matching the mutation’s default. Use the per-row Activate action when you’re ready to make it the serving region.
Register the control plane
Register CP 1 into the control plane registry and attach it to the region:-
cpIdis the stable UUID for this control plane. It comes from thecp-identitysecret on the cluster. Read it from the control plane itself rather than inventing one: -
nameis a human-readable identifier for this control plane and must be unique across the registry. -
regionIdis the region ID from the previous step.
ingressUrl or chartVersion — the APC API derives them from the control plane’s own configuration. The mutation is idempotent: re-running it with the same cpId refreshes those fields, which is useful after a Helm upgrade. The region must already exist before you register a control plane against it.
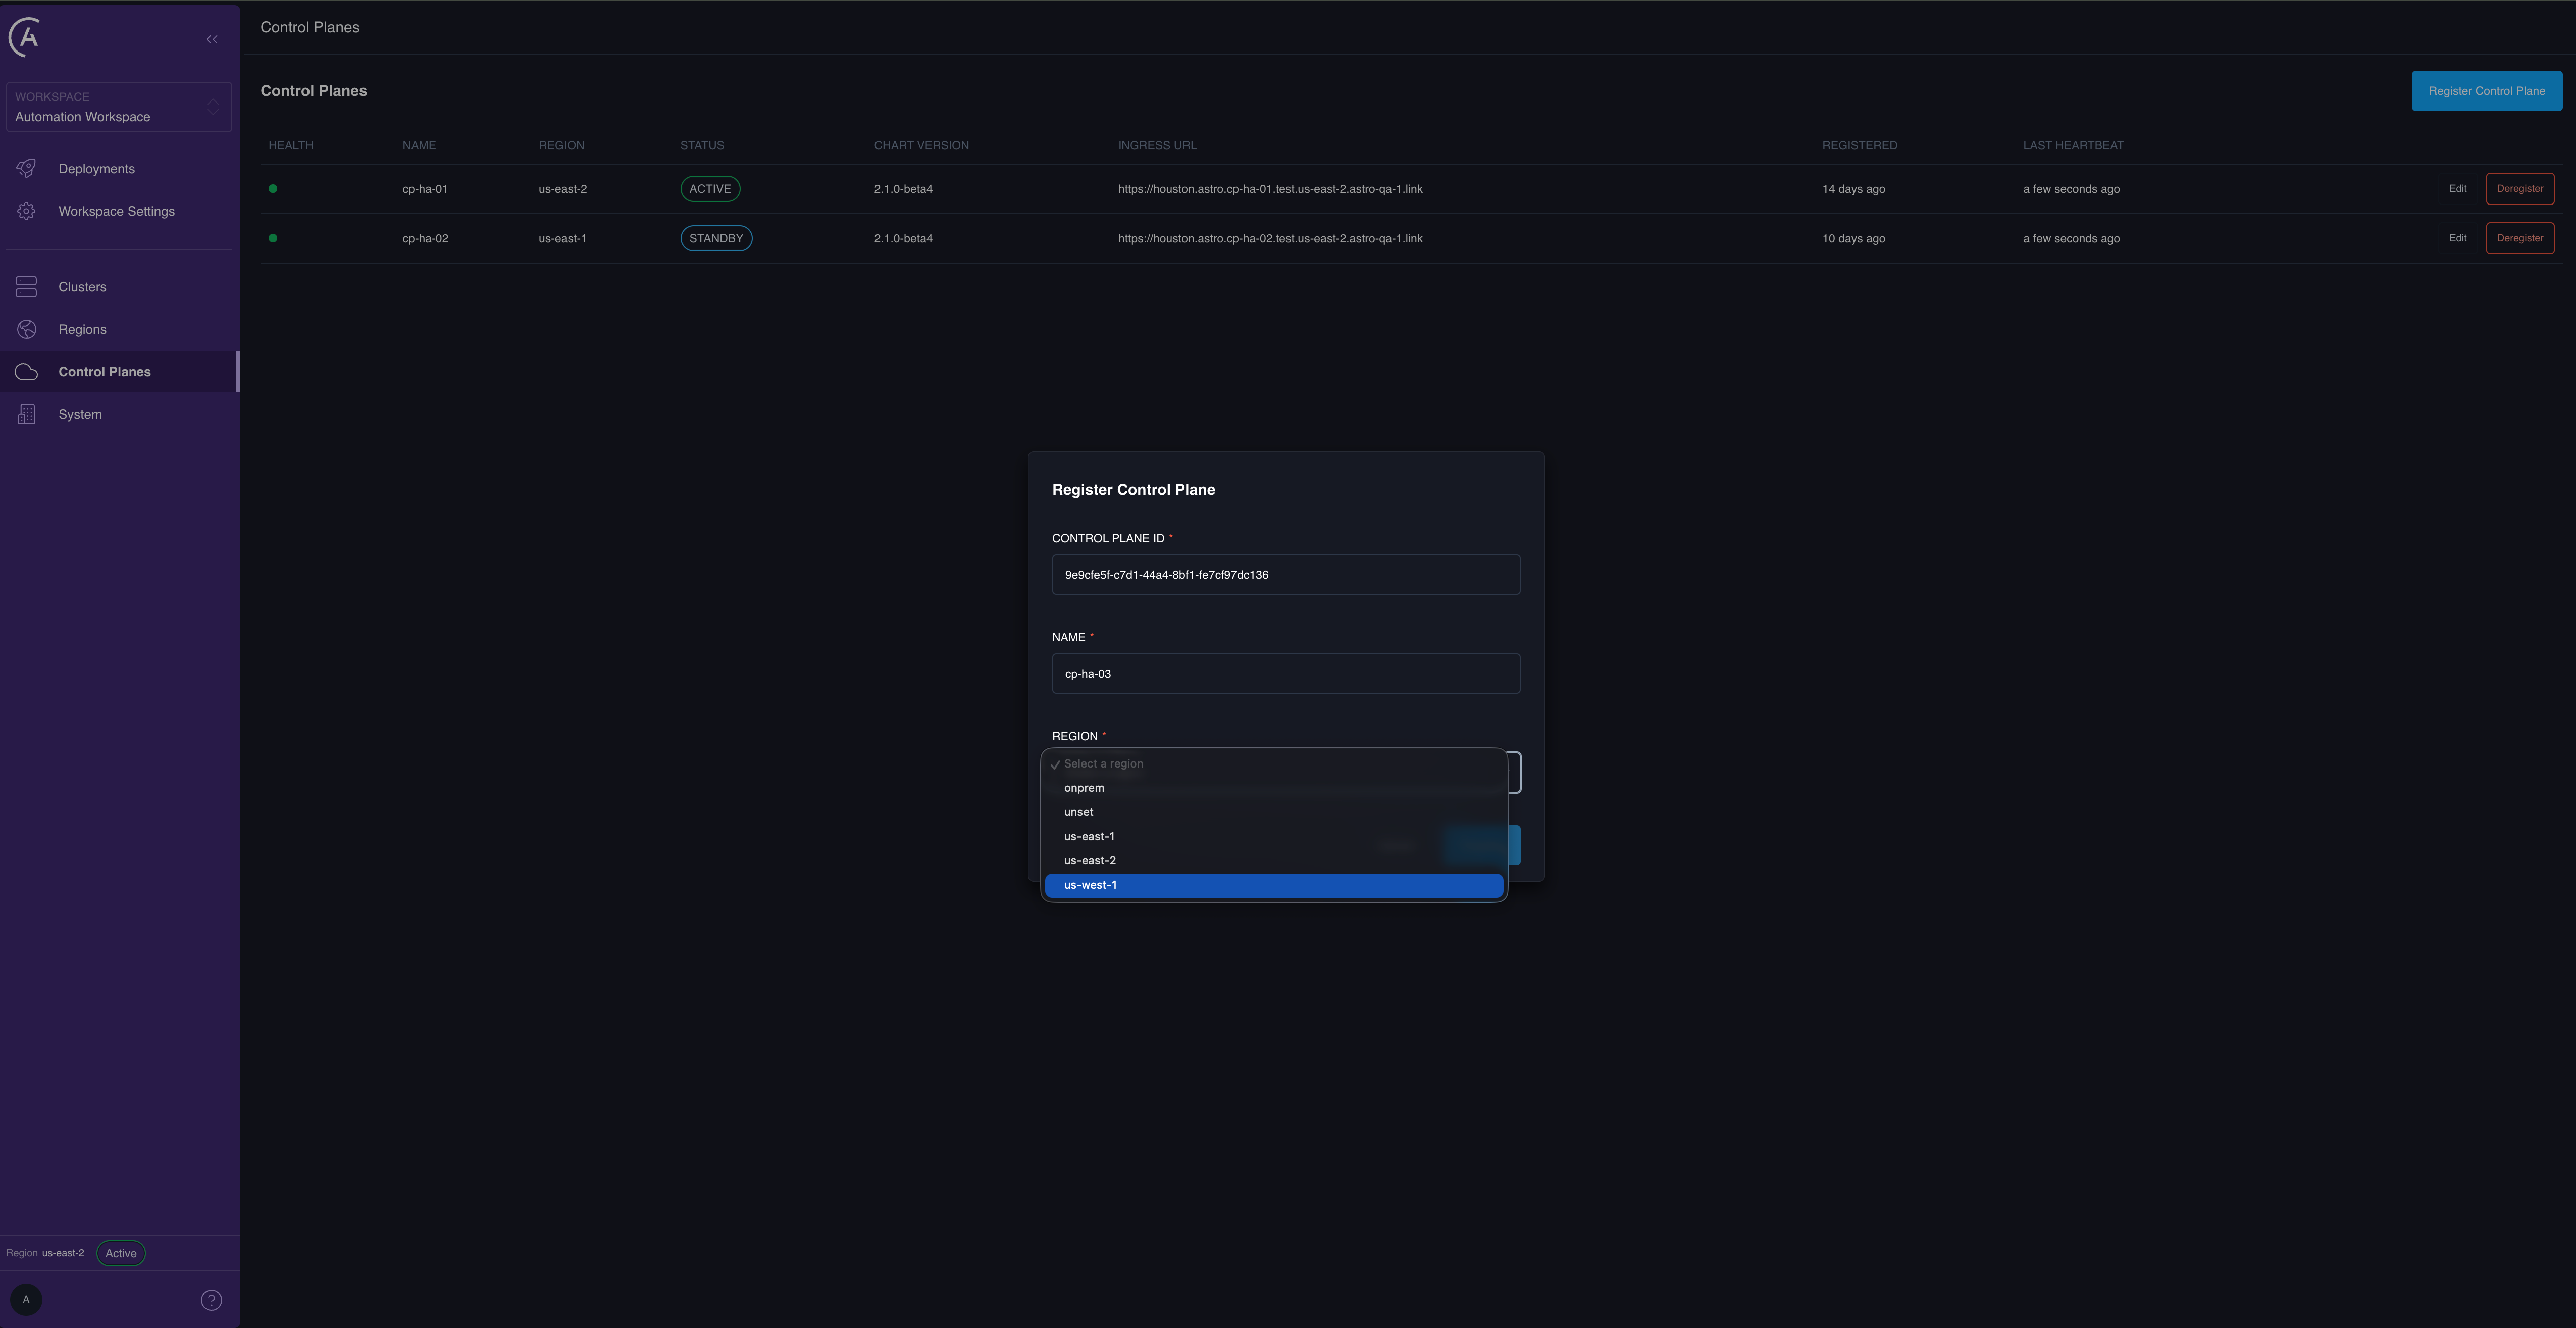
To register from the APC UI instead, use that control plane’s own admin URL (cpNN.<parent-domain>) so the identity pre-fills correctly. From CP 1’s admin URL, open the Control Planes tab and select Register Control Plane. The Control Plane ID field is pre-filled from this control plane’s cp-identity secret — leave it as-is. Enter a Name and select the Region you created, then save. The APC API populates Ingress URL and Chart Version automatically.
Register control plane 2
CP 2 needs its own registry entry so that the APC API knows it’s part of the group. Because both clusters share the same database, the region you created already exists, so you don’t create a new one. You only register the new control plane against that existing region. Run theregisterControlPlane mutation with CP 2’s own cpId and the same regionId from before:
cpId the same way as before, but from CP 2’s cluster:
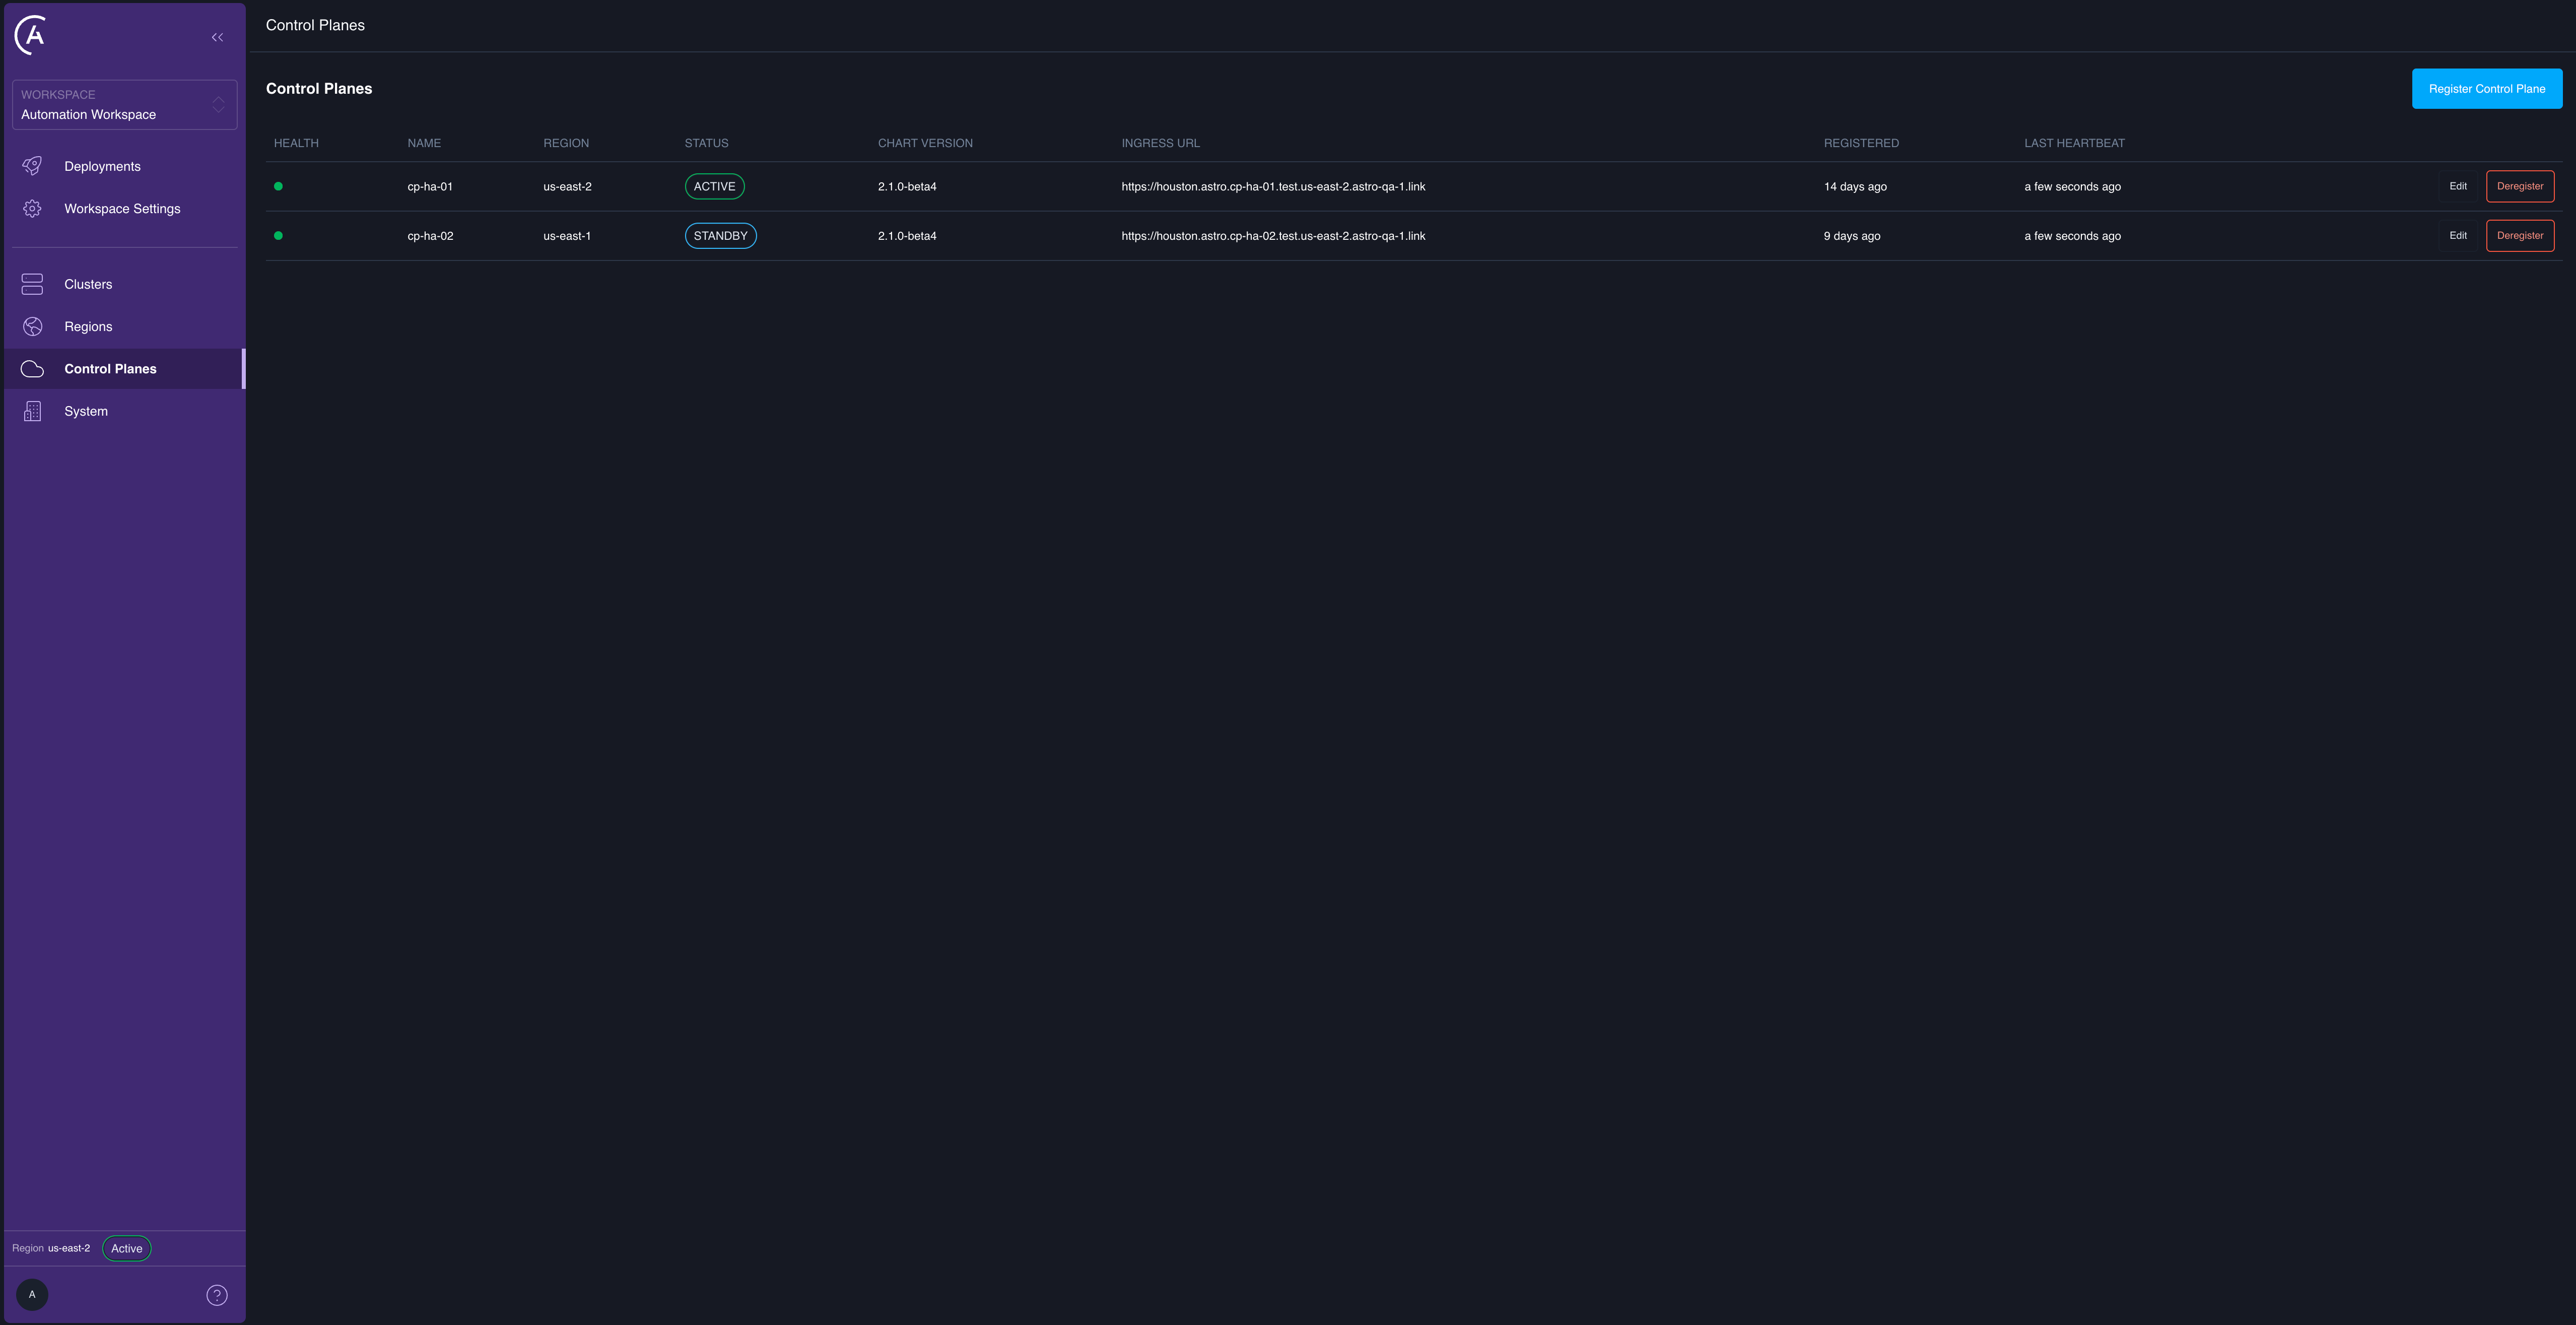
cp02.<parent-domain>), open the Control Planes tab, and select Register Control Plane. The Control Plane ID pre-fills with CP 2’s identity. Enter a Name and select the same Region as CP 1 — don’t create a new one — then save.
After this, both control planes are registered against the same region and are part of the same group. List the registered control planes to confirm that both entries share the same region.
Configure the global DNS
This step load-balances user traffic across the active region’s control planes and provides in-region high availability. Point the global names —app.<global-domain-name> and the rest of *.<global-domain-name> — at all of the control plane load balancers using weighted, health-checked DNS records, so that traffic is spread across the control planes and drained away from an unhealthy one automatically.
Create the record sets
For the shared global domain, create a record set that covers both:<global-domain-name>: the apex.*.<global-domain-name>: the wildcard. This one record set covers every customer-facing subdomain (app.,houston.,grafana.,prometheus.,alertmanager.).
- Weighted routing that gives every control plane an equal weight, so DNS load-balances evenly. Each control plane’s entry needs its own unique set identifier.
- A health check attached to each control plane’s entry, so that an unhealthy control plane is removed from rotation automatically.
Keep this separate from the per-CP admin records. The static per-CP admin records (
cp01.<parent-domain>, cp02.<parent-domain>) point directly at a single control plane and aren’t part of this weighted set. They intentionally bypass the load balancer.Configure the health check
Tie each control plane’s DNS entry to a health check that targets that control plane’s own APC API endpoint on its per-CP hostname, not the global one:- Protocol
HTTPS, port443. - Path
/controlplane/status, the APC API HA health endpoint. It reports the control plane as unhealthy if the control plane isn’t registered, cordoned, decommissioned, running an outdated chart version, or attached to an inactive region. - A reasonable cadence, for example a 30-second interval with a failure threshold of three.
/controlplane/status starts failing, its DNS entry is pulled from the record set and users are routed to the remaining healthy control planes. When it recovers, it’s added back automatically. At least one control plane must be healthy and in the active region to serve traffic. If every control plane is unhealthy, the global name serves nothing.
Verify
After the records are in place:* records for <global-domain-name> should show one weighted entry per control plane, each with its own health check. Take one control plane offline and confirm that its answer stops being served while the global domain stays reachable through the healthy control plane. After a control plane recovers, resolvers may keep serving a cached negative answer for the negative-cache TTL, so flush your local DNS cache and allow for upstream resolver TTLs when you verify recovery.
Add existing Astro Deployments to the global domain
Astro Deployments that existed before you enabled control plane reliability have their Apache Airflow ingress host rules and auth annotations (auth-url, auth-signin) pointing at the per-CP URL of whichever control plane last upserted them. For those Deployments to work under control plane reliability and be reachable on the global domain with cross-control-plane single sign-on (SSO), their ingresses must be re-stamped. Re-stamping:
- Adds the global-domain alias hosts (
<release>-airflow.….<globalBaseDomain>) alongside the existing per-CP hosts. - Repoints
auth-signintohttps://houston.<globalBaseDomain>/v1/auth/deployment-signin. - Regenerates
auth-url(…/v1/authorization) againstglobalBaseDomain.
.<globalBaseDomain>) is sent to the Deployment’s global Airflow subdomain, so SSO works across control planes.
For how the session cookie and Deployment URLs are scoped, see Cookie and URL strategy. Two ways to perform the re-stamp are available.
Automatic (default)
Becauseastronomer.houston.upgradeDeployments.enabled is true by default, the houston-upgrade-deployments hook runs on the same helm upgrade that enables control plane reliability, and on every control plane upgrade after that. It’s a post-upgrade hook, so it runs after the new configuration (including globalBaseDomain) is applied. It therefore re-stamps against the live global domain and doesn’t leave stale per-CP-only URLs. You don’t need to run any manual steps in the default configuration.
Manual (when the hook is disabled)
To decouple the re-stamp from the upgrade so you can run it in a maintenance window and scope the rollout, setastronomer.houston.upgradeDeployments.enabled: false. Existing Deployments are then not re-stamped automatically, and you run the script yourself after globalBaseDomain is live:
globalBaseDomain and the URL-helper and annotation support are live, so that it stamps the correct global URLs rather than per-CP ones.
Set
astronomer.houston.upgradeDeployments.enabled under the astronomer subchart, as shown. A top-level houston.upgradeDeployments.enabled doesn’t take effect and silently leaves the hook enabled.Configure identity provider redirect URLs
If you integrate an external identity provider (IdP), the redirect and callback URLs you register with the IdP must point at the global domain, not a per-CP domain. Under control plane reliability the APC API templates all customer-facing URLs, including the OAuthredirect_uri, from globalBaseDomain.
If you’re migrating an existing installation to control plane reliability and your IdP application was registered with a per-CP redirect URI, update it to the global-domain URI as part of enabling control plane reliability. For the exact values to register and the reason behind them, see Identity provider authentication and the OAuth redirect URL.