Run your first dag on Astro
Astro is the industry’s leading managed service for Apache Airflow®. To quickly learn how Astro works, follow the steps in this quickstart to create an Airflow environment and run your first dag.
When you first sign up for Astro, you can choose to tailor your experience based on how you plan to use Astro. The onboarding process includes:
- Creating an Organization, Workspace, and Deployment
- Choosing an example Airflow project template to clone into your own sample GitHub Repository
- Connecting your Astro Deployment to your sample GitHub Repository, so you can deploy code from GitHub
- Running your first dag on Astro
This tutorial takes about 15 minutes. If you’re new to Airflow and want a more in-depth tutorial, see Airflow 101 Learning Path.
Prerequisites
- An Astro account. To start an Astro trial and create your free trial account, see Start a trial.
- (Recommended) A GitHub account.
If you’re on your organization’s network and can’t access Astro, make a request to add the following domains to the allowlist on your network:
https://cloud.astronomer.io/https://api.astronomer.io/https://images.astronomer.cloud/https://auth.astronomer.io/https://updates.astronomer.io/https://install.astronomer.io/https://astro-<organization-short-name>.datakin.com/https://<organization-short-name>.astronomer.run/
Step 1: Tailor your Astro experience
Based on how you plan to use Astro, you can find more resources for particular topics relevant to your needs.
- Business or Personal use
- Familiarity with Apache Airflow
- Use cases, including:
- AI/ML
- Business Operations
- Reporting and Analytics
- Extract, transform, and loading operations (ETL)
- Other
Step 2: Create your Organization and Workspace
Enter a name for your Organization and Workspace. These can be changed later in the Astro UI.
An Astro Organization is the highest level entity in Astro and represents a shared space for your company on Astro. An Organization is automatically created when you first sign up for Astronomer. At the Organization level, you can manage all of your users, Deployments, Workspaces, and clusters from a single place in the Astro UI. A Workspace is a collection of Deployments that can be accessed by a specific group of users.
Step 3: Select a template
An Astro project contains the set of files necessary to run Airflow, including dedicated folders for your dag files, plugins, and dependencies. Select a template Astro project to immediately get a demonstration of Airflow’s orchestration capabilities.
- Generative AI: Airflow is a common orchestration engine for AI/Machine Learning jobs, especially for retrieval-augmented generation (RAG). This generative AI project shows a simple example of building vector embeddings for text and then performing a semantic search on the embeddings.
- ETL: Use a template to make an example ETL pipeline. This template shows an example pattern for defining an ETL workload using DuckDB as the data warehouse of choice.
- Learning Airflow: This example project is generated when you run
astro dev initusing the Astro CLI. It shows a basic Astro project with Airflow components and dags. - dbt on Astro: This template showcases using dbt and Airflow together with Cosmos, allowing you to deploy dbt in production according to Airflow best practices.
- None: This option allows you to manually deploy a project after making a Deployment. See Deploy code with GitHub to use a GitHub connection with an existing project in a repo. Or, you can choose to manually build and Deploy an example dag by following the steps in Run your first dag with the Astro CLI or Run your first dag with GitHub Actions.
Step 4: Set up your Astro Deployment
You can now confirm your selected template and finish configuring your Deployment resources and whether you want to use a GitHub connection for code deploys.
An Astro Deployment is an instance of Apache Airflow that is powered entirely by core Airflow components, including a webserver, scheduler, and one or more workers. You deploy dags to a Deployment, and you can have one or more Deployments within a Workspace.
- Selected template: When you finalize your Deployment, you can confirm or change the template option you selected in Step 3.
- Git connection: Enter your GitHub Owner and Repository Owner information to deploy code directly to an Astro Deployment when you merge changes to a specific branch. If you choose to skip connecting to GitHub, later, you can return and manually build and Deploy an example dag by following the steps in Run your first dag with the Astro CLI or Run your first dag with GitHub Actions.
- Review Deployment: Enter a Name for your Deployment and choose the Provider that you want to use and Region where you’d like to host your resources.
After you finish configuring your Deployment, click Create your Project Repository and Deploy to Astro.
Step 5: Run your first dag on Astro
When you create your project and deploy it to Astro, this automatically creates a new Deployment and makes a private GitHub repository in your account with the template that you selected. Then, you can open Airflow and run your dag.
Newly-deployed dags are paused by default and will not start running automatically. To run one of the example dags in your Astro project according to its schedule, you must unpause it from the Airflow UI hosted on your Deployment.
If you did not connect to GitHub or choose a sample template to use, you can instead follow the steps in Run your first dag with the Astro CLI or Run your first dag with GitHub Actions to start working in Astro.
-
Click Go to your Deployment.
-
Click Deployments and then choose your active Deployment to view details about it.
-
Select Deploy History to see when your code successfully deploys from your GitHub repository.
-
After your deploy is successful, click Open Airflow to access the Airflow UI.
-
Manually trigger a dag run by clicking the play button in the Actions column. When you develop dags on Astro, triggering a dag run instead of waiting for the dag schedule can help you quickly identify and resolve issues.
-
(Optional) Depending on the template you use, you might be prompted to configure some parameters for your dag to use. You can choose to keep the default parameters, or make changes from the default. When you finish making changes, click Trigger to run your dag.
After you press Play, the Runs and Recent Tasks sections for the dag start to populate with data.
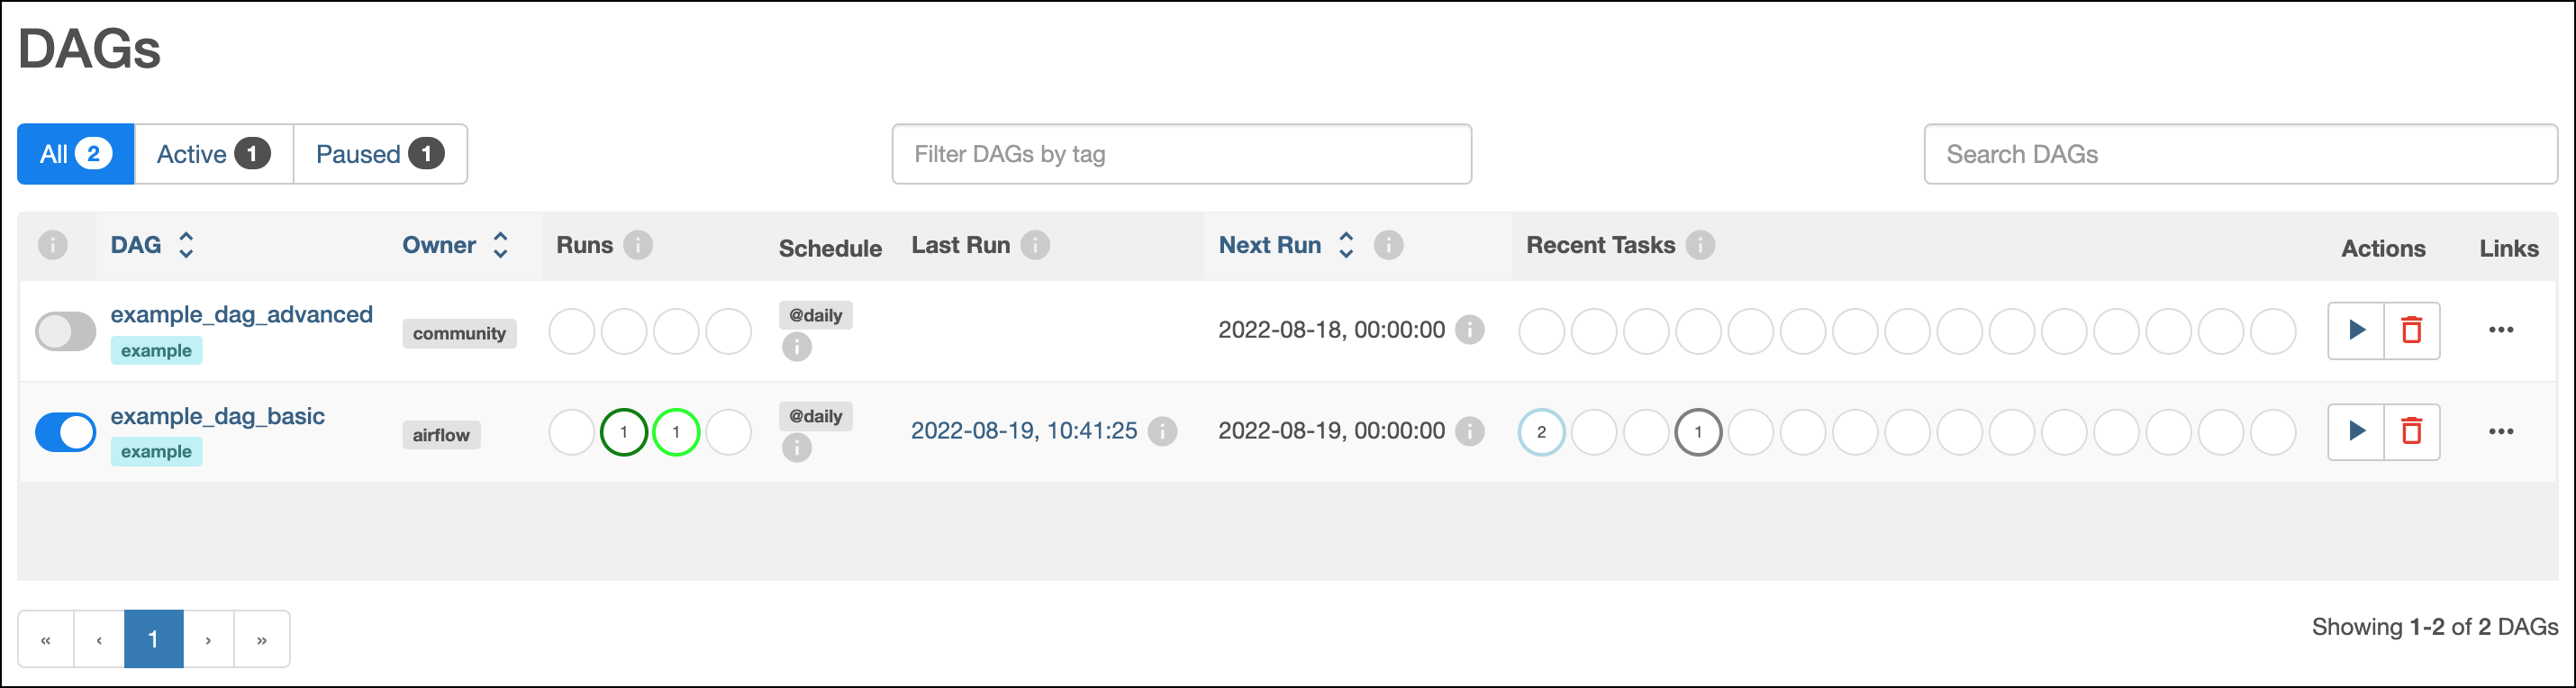
These circles represent different states that your dag and task runs can be in.
-
Click the name of the dag to view more details about its execution.
- After your dag finishes executing, click Logs to view any printed output of your dag’s results.
Congratulations! You deployed and ran your first dag on Astro!
Next Steps
- Develop your Astro project.
- Read more about Developing CI/CD workflows.
- Install the CLI to test dags or run Airflow locally.
- Write your First dag.