This tutorial demonstrates using the Astro Terraform Provider to automate the onboarding process for a new team by creating and managing an Astro workspace and deployment.
We recently released the official Astro Terraform Provider. Terraform is the industry-standard infrastructure-as-code tool to automate the creation and management of infrastructure.
The Astro Terraform provider brings significant value to organizations by enabling automated, consistent, and scalable management of your Astro infrastructure, reducing manual errors and improving efficiency. The provider currently supports several resources including clusters, workspaces, deployments, and team to workspace role mappings.
Getting Started With the Astro Terraform Provider
In this tutorial, I will guide you through using the Astro Terraform provider to automate the onboarding of a new team by creating and managing an Astro workspace and deployment. By the end of this tutorial, you will have a fully automated setup that is reproducible and easily scalable to more teams.
Create Your Terraform Working Directory
Create a folder for your Terraform project e.g. my-data-platform and save the following code in a file named terraform.tf:
terraform {
required_providers {
astro = {
source = "astronomer/astro"
version = "0.3.0"
}
}
}
provider "astro" {
organization_id = "... insert your organization id here ..."
}
Insert your organization's ID on line 11. The working directory will contain all your Terraform code, and all Terraform commands will be run from this directory.
Initialize the Terraform Working Directory
Run terraform init and you'll see Terraform downloading and installing the Astro Terraform provider to your local machine:
$ terraform init
Initializing the backend...
Initializing provider plugins...
- Finding astronomer/astro versions matching "0.3.0"...
- Installing astronomer/astro v0.3.0...
- Installed astronomer/astro v0.3.0 (signed by a HashiCorp partner, key ID F5206453FDEA33CF)
...
Terraform has been successfully initialized!
You may now begin working with Terraform. Try running "terraform plan" to see
any changes that are required for your infrastructure. All Terraform commands
should now work.
...
The versions and hashes of providers are stored in a (generated) file .terraform.lock.hcl. Store this file in version control.
Authenticating with Astro
For any automated action on Astro, you need an API token to authenticate. API tokens exist on different levels. Since we're going to create a workspace, we need an Organization API token with Organization Owner permissions. Create a token and ensure it's configured as an environment variable ASTRO_API_TOKEN when running Terraform commands:
export ASTRO_API_TOKEN=...
Define Resources in Terraform
In a file main.tf, define two resources, an astro_workspace and an astro_deployment. These resources will represent an Astro workspace and Astro deployment, defined in Terraform code:
resource "astro_workspace" "my_first_tf_workspace" {
name = "My first TF workspace"
description = "My first Terraform-created workspace"
cicd_enforced_default = false
}
resource "astro_deployment" "my_first_tf_deployment" {
name = "My first TF deployment"
description = "My first Terraform-created deployment"
type = "STANDARD"
cloud_provider = "AWS"
region = "us-east-1"
contact_emails = []
default_task_pod_cpu = "0.25"
default_task_pod_memory = "0.5Gi"
executor = "CELERY"
is_cicd_enforced = true
is_dag_deploy_enabled = true
is_development_mode = false
is_high_availability = false
resource_quota_cpu = "10"
resource_quota_memory = "20Gi"
scheduler_size = "SMALL"
workspace_id = astro_workspace.my_first_tf_workspace.id
environment_variables = []
worker_queues = [{
name = "default"
is_default = true
astro_machine = "A5"
max_worker_count = 10
min_worker_count = 0
worker_concurrency = 1
}]
}
One of the key characteristics (and benefits) of using Terraform is that it's declarative. Take for example the line workspace_id = astro_workspace.my_first_tf_workspace.id; this tells Terraform to configure the workspace ID in the deployment. This means the workspace must be created first, producing an ID which is a generated value and unknown at the time of writing. We don't have to instruct Terraform to create resources in a certain order, we only have to instruct what to create. The resources above can be defined in any order. Terraform takes the relationships between resources into account when deciding the order of creating resources.
Define Outputs
And (optionally) in a file outputs.tf, define values you'd like to log after creating the infrastructure. We'll output the workspace and deployment IDs:
output "terraform_workspace" {
description = "ID of the TF created workspace"
value = astro_workspace.my_first_tf_workspace.id
}
output "terraform_deployment" {
description = "ID of the TF created deployment"
value = astro_deployment.my_first_tf_deployment.id
}
Showing output values is not necessary in this case, but provides us (humans) information about created resources.
Preview the Terraform changes
You should now have 3 files:
- terraform.tf
- main.tf
- outputs.tf (optional)
Run terraform plan to let Terraform create an execution plan and preview the infrastructure changes that Terraform will make. You'll see the following text:
$ terraform plan
Terraform used the selected providers to generate the following execution plan. Resource actions are indicated with the following symbols:
+ create
Terraform will perform the following actions:
+ resource "astro_deployment" "my_first_tf_deployment" {
...
}
+ resource "astro_workspace" "my_first_tf_workspace" {
...
}
Plan: 2 to add, 0 to change, 0 to destroy.
Changes to Outputs:
+ terraform_deployment = (known after apply)
+ terraform_workspace = (known after apply)
The key message to look for is "Plan: 2 to add, 0 to change, 0 to destroy.", which validates that we're about to create two resources, which are the workspace and deployment as defined in main.tf.
Apply the Terraform Plan
Next, run terraform apply and select yes to execute the plan. This creates the Astro resources and will print their ids, as we defined in outputs.tf:
$ terraform apply
Terraform used the selected providers to generate the following execution plan. Resource actions are indicated with the following symbols:
+ create
Terraform will perform the following actions:
...
Do you want to perform these actions?
Terraform will perform the actions described above.
Only 'yes' will be accepted to approve.
Enter a value: yes
astro_workspace.my_first_tf_workspace: Creating...
astro_workspace.my_first_tf_workspace: Creation complete after 0s [id=clxn24vhy0as101ohmeg9i72o]
astro_deployment.my_first_tf_deployment: Creating...
astro_deployment.my_first_tf_deployment: Creation complete after 1s [id=clxn24vs00afv01ot12ph6ejb]
Apply complete! Resources: 2 added, 0 changed, 0 destroyed.
Outputs:
terraform_deployment = "clxn24vs00afv01ot12ph6ejb"
terraform_workspace = "clxn24vhy0as101ohmeg9i72o"
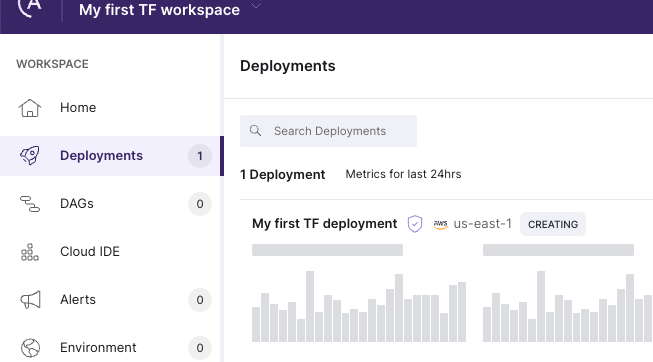
The resources were created and will now be visible in Astro:
Cleaning Up Terraform-Created Resources
Finally, to clean up the resources, run terraform destroy and select yes:
$ terraform destroy
astro_workspace.my_first_tf_workspace: Refreshing state...
[id=clxn24vhy0as101ohmeg9i72o]
astro_deployment.my_first_tf_deployment: Refreshing state...
[id=clxn24vs00afv01ot12ph6ejb]
Terraform used the selected providers to generate the following execution plan. Resource actions are indicated with the following symbols:
- destroy
Terraform will perform the following actions:
...
Plan: 0 to add, 0 to change, 2 to destroy.
Changes to Outputs:
- terraform_deployment = "clxn24vs00afv01ot12ph6ejb" -> null
- terraform_workspace = "clxn24vhy0as101ohmeg9i72o" -> null
Do you really want to destroy all resources?
Terraform will destroy all your managed infrastructure, as shown above.
There is no undo. Only 'yes' will be accepted to confirm.
Enter a value: yes
astro_deployment.my_first_tf_deployment: Destroying...
[id=clxn24vs00afv01ot12ph6ejb]
astro_deployment.my_first_tf_deployment: Destruction complete after 1s
astro_workspace.my_first_tf_workspace: Destroying...
[id=clxn24vhy0as101ohmeg9i72o]
astro_workspace.my_first_tf_workspace: Destruction complete after 0s
Destroy complete! Resources: 2 destroyed.
The output shows two destroyed resources which are the workspace and deployment that we first created.
Conclusion
Terraform is an invaluable tool to platform teams who manage infrastructure for development teams. Just by running terraform apply, we created a workspace and deployment in seconds. Since those resources are defined in code, we can repeat those steps for additional teams and get new teams up and running quickly. Manually configuring such resources in a UI is error-prone and time-consuming so it always a good idea to automate infrastructure when you plan on repeating work more than once.
For more information about the Astro Terraform provider, check out:
Additionally, Astronomer offers several other tools to support infrastructure automation:


